By default, System Restore is enabled on all Windows operating systems, including Windows 10.
But some users who upgraded their computers to Windows 10 are reporting that their System Restore feature was turned off.
It is therefore imperative that all users check if System Restore is enabled on their systems, and if not to turn it on.
This tutorial will show you how to turn on and enable System Restore in Windows 10.
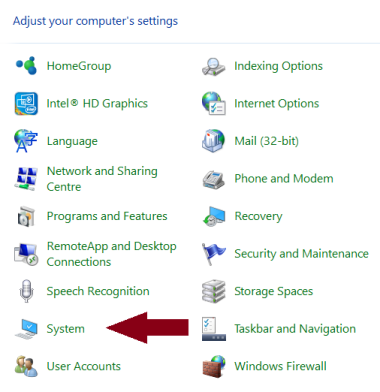
To check if your System Restore has been disabled or not, Click on Search and type in Control Panel.
Select the top option in the list:
Click on System to open Control Panel’s System applet.
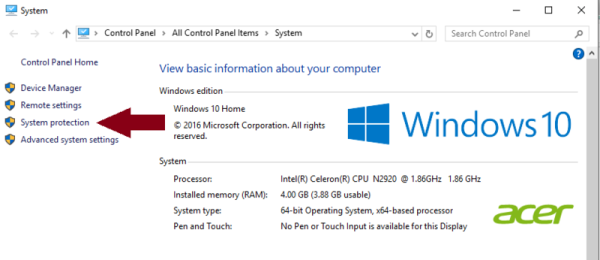
In the left pane, you will see System protection.
Click on it to open Systems Properties.
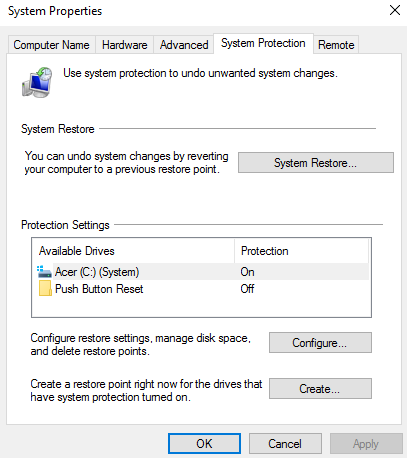
Under System Protection tab, you will see the Protection Settings.
Ensure that Protection is set to ‘On’ for the System drive.
——————–
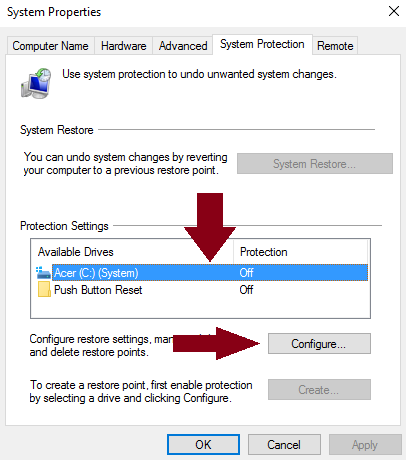
If not, select the System Drive or C Drive and press on the [B]Configure[/B] button.
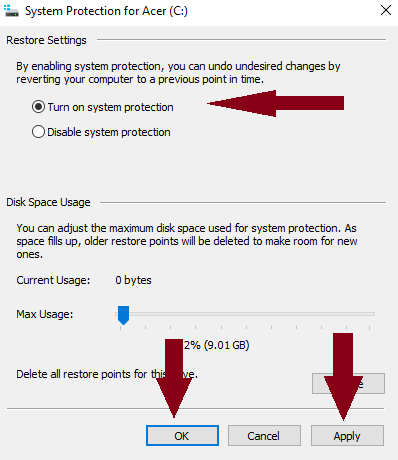
Select Turn on system protection and click on Apply >> OK.
That’s it! You will have enabled System Restore on Windows 10

